
Fine Dining Photography Gear Key Takeaways
Nailing the perfect shot of a Michelin-starred dish requires more than a sharp eye—it demands the right fine dining photography gear .
- Fine dining photography gear starts with a full-frame mirrorless body and a macro tilt-shift lens for control.
- Lighting separates flat food shots from images that make readers book a table—diffused strobes beat speedlights.
- Avoid Anne’s three costly mistakes: skimping on a tripod, ignoring color calibration, and packing too much gear.
Why Fine Dining Photography Gear Matters for Review Shots
Anne reviews dozens of high-end restaurants every year. Each review includes a gallery of food images that must look as good as the plating. Cheap gear introduces flares, color casts, and soft details that kill credibility. With the right setup, you can shoot consistent, mouthwatering photos even in dim dining rooms. For a related guide, see Fine Dining Crawl: Expert Tips for a 2-3 Restaurant Night Out.
The investment pays off quickly. A single well-lit photo can double the click-through rate of a blog post and build trust with readers who recognize quality. Below is the exact kit Anne relies on, plus the mistakes she made early in her career.
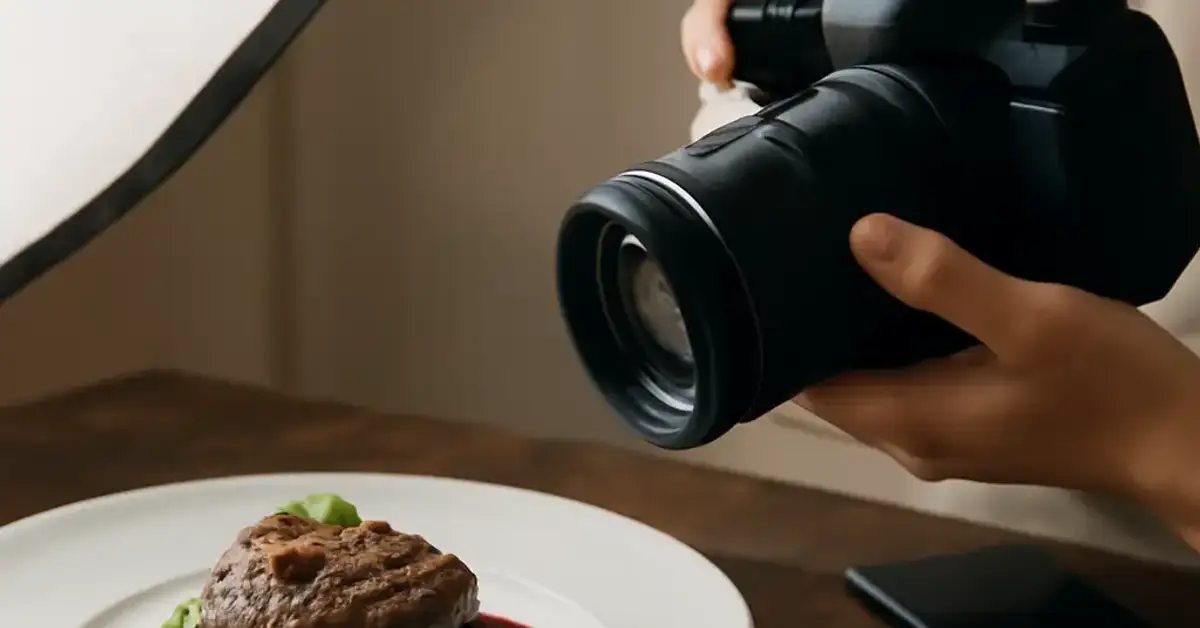
Anne’s Camera Body: Full-Frame Mirrorless for Maximum Detail
Anne shoots with a Sony α7R IV (61 megapixels) for its dynamic range and high-resolution sensor. The extra megapixels let her crop into garnishes without losing detail. For low-light restaurant scenes, the dual ISO base keeps noise minimal at high shutter speeds.
Why Mirrorless Over DSLR?
Mirrorless bodies are lighter and quieter—essential when diners are ten feet away. The electronic viewfinder shows the exact exposure before you press the shutter, saving time. Plus, the Sony lens mount works with adapters for tilt-shift lenses.
Lenses: The Key to Texture and Depth
Anne uses two primary lenses for fine dining photography gear:
| Lens | Why Anne Uses It | Best For |
|---|---|---|
| Canon TS-E 90mm f/2.8L Macro | Tilt-shift controls focus plane to keep food sharp from plate to garnish. | Overhead shots, flat lays, detail shots |
| Canon EF 100mm f/2.8L Macro IS USM | 1:1 magnification captures every droplet and crumb. | Close-ups of sauces, bubbles, textures |
Both lenses pair with a Sony-to-EF adapter. The tilt-shift is a game-changer for plated dishes—it lets Anne keep the plate sharp while adding a soft falloff to the background.
Lighting: Controlled Strobes Over Available Light
Anne learned early that relying solely on restaurant light creates mixed color temperatures and harsh shadows. She now uses two Godox AD200 Pro strobes with softboxes. The 200Ws output is enough to overpower ambient tungsten without blinding guests.
Diffusers and Modifiers
A 24×24-inch foldable softbox gives soft, wraparound light. For overhead shots, she uses a 53-inch octabox with a 5° grid to direct light only onto the plate. A small LED panel (Aputure Amaran AL-MC) adds a warm rim light for contrast.
Accessories That Prevent Blurry Shots
Anne’s first costly mistake: shooting handheld at slow shutter speeds. Now she always carries a Gitzo Series 2 tripod and an Arca-Swiss ball head. The rigid legs eliminate micro-motion, and the ball head makes minute adjustments simple.
Color Calibration Is Non-Negotiable
Mistake number two: not calibrating her monitor. Anne uses a X-Rite i1Display Pro to match screen and prints. Without it, food can look greenish or oversaturated. She also carries a ColorChecker Passport to white-balance every scene.
Packing Light
Mistake three: bringing too much gear. Anne used to carry three bodies and six lenses. Now she limits herself to one body, two lenses, one flash system, and a small stand. Less weight means faster setup and fewer errors.
Real-World Example: Shooting a Tasting Menu
Anne recently reviewed a seven-course tasting menu. She arrived 30 minutes early, set up near a window for ambient fill, and placed her strobe at 45 degrees to the plate. The tilt-shift lens kept the course’s main element sharp while softening the background herbs. The result was a gallery that the restaurant itself shared on its Instagram.
How to Build Your Own Fine Dining Photography Gear Kit
Start With a Used Full-Frame Body
You do not need the latest model. A Sony α7 III or Canon EOS R6 will deliver excellent results. Pair it with a 90mm macro lens. This combo covers 90% of food scenarios.
Add One Quality Light Source
A Godox AD200 or Profoto A2 is portable and powerful. Learn one modifier—an umbrella or softbox—before buying more.
Invest in a Tripod and Color Card
A cheap tripod wobbles. Spend at least $200 on a carbon fiber model. Add a color card to ensure accurate white balance every time.
Useful Resources
For deeper dives into fine dining photography gear, visit DPReview’s lens database for real-world tests on macro and tilt-shift glass. Also check The Food Photography Blog for lighting tutorials specific to low-light restaurant environments.
Frequently Asked Questions About Fine Dining Photography Gear
What is the best camera for fine dining photography ?
A full-frame mirrorless camera like the Sony α7 IV or Canon EOS R6 provides high resolution and low noise in dim conditions, essential for fine dining photography. For a related guide, see Fine Dining with Infants: 5 Essential Tips for High Chairs and Noise Tolerance.
Do I need a macro lens for food photography?
Yes, a macro lens (90mm to 100mm) lets you capture texture details that make food look appetizing. It also gives a pleasing background blur.
Can I use a smartphone for fine dining reviews?
Modern phones are capable, but they lack the control of a dedicated camera. For professional review shots, a full-frame body and proper lens are strongly recommended.
What lighting gear do professionals use?
Anne uses Godox AD200 Pro strobes with softboxes. These are lightweight, powerful, and do not overwhelm small restaurant tables.
How do I avoid harsh shadows in food photos?
Use a diffuser or softbox to soften the light. Position the light at a 45-degree angle to the plate, and bounce some light back with a white reflector.
Why does Anne use a tilt-shift lens?
A tilt-shift lens controls the plane of focus, so the entire plate stays sharp even when shot at an angle. It also mimics a view camera look.
What tripod is best for food photography?
Anne uses a Gitzo Series 2 with an Arca-Swiss ball head. Look for carbon fiber legs for stability without weight.
Should I always use a tripod?
Yes, especially in low light. It eliminates camera shake and lets you use lower ISO for cleaner images.
How do I get the white balance right in a restaurant?
Use a color calibration card like the ColorChecker Passport to set a custom white balance in that room. Do not rely on auto WB.
What is the most common mistake in food photography?
Shooting handheld with slow shutter speeds and relying on ambient light. It leads to blurry, dull photos.
How many lenses do I really need?
Start with a 90mm macro. Later, add a wide-angle (24-35mm) for overhead shots and a 50mm for context.
Is strobe or continuous light better?
Strobe (flash) is better because it freezes motion and has enough power to overcome mixed light. Continuous LEDs are fine for video.
Why do my food photos look flat?
Lack of contrast often comes from flat lighting. Add a rim light or move your key light to 45 degrees off-axis to create depth.
Can I use a ring light for food?
A ring light creates even, shadowless light but removes texture. It is better for video than for still food photography.
What aperture is best for food shots?
Between f/8 and f/11 for most plates. This gives enough depth of field to keep the dish sharp while softening the background.
How do I shoot dark desserts without losing detail?
Increase the exposure time, use a tripod, and bounce a soft strobe off a white ceiling or board. Avoid cranking ISO above 3200.
What memory cards do professionals use?
High-speed SD cards like Sony Tough or SanDisk Extreme Pro with at least 170 MB/s write speed. Shoot in RAW for maximum editing flexibility.
Should I edit food photos in RAW?
Yes, RAW files contain all the sensor data. You can correct white balance, exposure, and shadows without destroying quality.
How can I make my food photos look more professional?
Focus on lighting, use a tripod, calibrate your monitor, and simplify the composition. Remove clutter from the frame.
What is the best way to transport gear to a restaurant?
Use a padded backpack like the Peak Design Everyday Backpack 20L. It fits a body, two lenses, one strobe, and accessories.